As my family gathers to celebrate Christmas together, it's crazy around here. We will have 8 adults, 3 children from 8 to 2, and a sweet doggie on Christmas morning. I'm doing as much food prep ahead as I can. Tonight it pasta with Bolognese sauce and salad. Fudgy chocolate pudding cake with ice cream will be dessert.
For Christmas Eve we usually have appetizers and finish with English Trifle and Danish Aebleskiver. The trifle is a favorite of mine because it can be made a day ahead and we will have enough left for Christmas dinner. I finally found the recipe for Spinach Artichoke Dip that we all like. After searching for hours, I emailed my friend and asked her to send it again.
Espinacha Dip
1 (10 ounces) package frozen chopped spinach, squeezed dry
1 can (10 ounces) chopped tomatoes and green chiles
1 (14 ounces) can artichoke hearts
1 (8 ounces) package 1/3 less fat cream cheese, softened
1 (4 ounces) can sliced ripe olives, drained
1 cup grated colby-jack cheese
1 cup light sour cream
1 1/2 tablespoons red wine vinegar
1/2 teaspoon salt
Hot pepper sauce, to taste
Corn chips (our favorite are the Fritos Scoops).
Combine all the ingredients but the corn chips in a food processor. Pulse until ingredients are chopped and well mixed. Place in an oven safe baking dish and heat at 400 degrees F. about 30 minutes or until bubbly. Serve with corn chips.
Wednesday, December 22, 2010
Friday, December 10, 2010
Keep It Simple
We're going to have lots of activity around here the week of Christmas so I'm trying to plan ahead and enjoy it all. When my children were younger I read in a magazine that by asking everyone their favorite treat I could reduce the amount of baking I did. No kidding! All three of them chose the same thing, Buckeyes (chocolate dipped peanut butter balls). This is now a favorite of my grandsons.
Back to keeping it simple. This is the house where my husband always chooses Birthday Pie- Pecan is his favorite.I'm going to make Pecan Bars- they are a cross between pie and Pecan Tassies.
Here's the recipe from Baking Basics and Beyond (Surrey Books, 2006).
Pecan Pie Bars
If pecan pie is one of your favorites, you’ll love these easy-to-make bars. For a fast, fabulous dessert, cut the bars into 2- or 3-inch squares, heat them slightly in the microwave, and top the warm squares with a scoop of vanilla ice cream and a spoonful of caramel sauce.
MAKES 48 BARS
2 cups all-purpose flour
1/4 cup firmly packed brown sugar
3/4 cup butter, cut-up
Filling
2 1/4 cups firmly packed brown sugar
3 eggs, beaten
2 tablespoons butter, melted
1 1/2 teaspoons vanilla
1 cup coarsely chopped pecans, toasted
Heat oven to 350°F with oven rack in middle.
Combine flour and brown sugar in bowl of a heavy-duty mixer. Add butter and beat on Medium speed until mixture resembles coarse crumbs.
Press the crust into bottom and slightly up sides of a 13 x 9-inch baking pan. Bake 12 minutes. The crust will be lightly browned.
Filling
Beat brown sugar, eggs, butter, and vanilla in same mixer bowl on Low speed until smooth. Stir in pecans. Pour into crust.
Bake 25 to 30 minutes or until set in center. A knife inserted in center will come out clean but wet. Cool on wire cooling rack before cutting. Refrigerate bars.
Sunday, December 5, 2010
Bake with the Best Ingredients

Last Thursday the Taste section of the Minneapolis Stray Tribune ran an article I wrote on baking ingredients. I've posted the link below.
If there is one hard and fast rule I go by it is to use high quality ingredients. I always use butter and am starting to use unsalted butter more. I like the flavor it gives and have found that I need to adjust the salt in the recipe slightly (add a little more).
http://www.startribune.com/lifestyle/taste/111142709.html?elr=KArks7PYDiaK7DUqEiaDUiD3aPc:_Yyc:aULPQL7PQLanchO7DiUr
Thursday, December 2, 2010
Showcase MN with Holiday Tips
I appeared on Showcase Minnesota yesterday. We talked about ways to make holiday entertaining easier. My best suggestion: Plan Ahead. Here's the link.
http://www.showcaseminnesota.com/show/client_article.aspx?storyid=886356
http://www.showcaseminnesota.com/show/client_article.aspx?storyid=886356
Monday, November 29, 2010
Looking Ahead to the Holidays
It's not even December 1st but I'm already thinking about ways to make this season a little less stressful. I've been writing an article on appetizers and looking at ways to make them ahead or for very easy recipes.
Here are some ideas for "fast and easy".
Make spiced nuts or snack mixes to have on hand.
Red pepper jelly keeps well in the refrigerator and is delicious on top of a black of cream cheese surrounded by crackers.
For last minute guests, pop a batch of popcorn and season it with some chili powder and ground cumin or create your own herb combination. This is perfect with drinks.
Here's an old favorite that is served warm with crackers or rye bread.
Chipped Beef Dip
8 ounces cream cheese, softened
1/2 cup sour cream
2 tablespoons milk
1/4 teaspoon salt
1 (2-3 ounces) package dried beef, chopped
1/2 cup chopped green onions
1/2 cup chopped walnuts
Crackers or cocktail rye bread
Beat the cream cheese in a medium bowl until it's smooth. Stir in the sour cream, milk and salt until smooth and creamy. Add the chopped beef and onions and mix. Spoon into an ovenproof baking dish (pie plate). Sprinkle with the walnuts.
Bake 20 to 25 minutes or until heated through and walnuts are toasted. Serve with crackers or rye bread.
Monday, November 22, 2010
Simplify Your Thanksgiving
Thanksgiving is probably the holiday most imbued with traditions. This year shake it up- but just a bit.
Last night I saw Bobby Flay lose a throwdown Thanksgiving Dinner because he didn't have any mashed potatoes! Well, duh! But you can make them ahead and keep them hot in a crock pot eliminating the last minute rush. Consider having a fresh vegetable side dish, too.
If you have a large frozen turkey, it should already be thawing in the refrigerator. If it's not thawed in time, defrost in cold water, changing the water every 30 minutes.
Cranberry Sauce is always a favorite and can be made several days ahead. You might want to try a new salad or side dish but don't stray too far.
When someone offers to "bring something", let them. Light appetizers, fresh bread or wine are easy to bring and are one less thing to worry about.
Plan ahead for the big dinner and look for recipes that say "MAKE AHEAD!" Set the table the day before and evaluate your oven space.
Remember, the best part of the day is sharing with family and friends. Here's a recipe for a pumpkin pie from Baking Basics and Beyond that's just a little different.
Happy Thanksgiving!
Pumpkin Streusel Pie
Contribute a pumpkin pie for Thanksgiving dinner, and you will be a very popular guest.
SERVES 8
Pastry for a 9-inch single-crust pie
1 (15-ounce) can pumpkin
3/4 cup firmly packed light brown sugar
2 large eggs, slightly beaten
1 teaspoon cinnamon
1/4 teaspoon salt
1 (12-ounce) can evaporated milk
Topping
1/4 cup firmly packed brown sugar
1/4 cup all-purpose flour
3 tablespoons cold butter
1/2 cup chopped pecans, toasted
Sweetened Whipped Cream
Heat oven to 425°F with oven rack in lower third.
Crust
Roll out pastry into an 11-inch circle. Loosely roll dough around rolling pin and lift it into 9-inch pie pan. Unroll and press dough into pan edges and bottom, making sure that the pastry is not stretched.
Filling
Combine pumpkin and 3/4 cup brown sugar in large bowl and mix until sugar dissolves and no lumps remain. Add eggs, cinnamon, and salt and whisk until smooth. Stir in milk. Pour pumpkin mixture into pastry shell.
Bake 15 minutes.
Topping
Combine 1/4 cup brown sugar with flour. Cut in butter with pastry blender until mixture resembles coarse crumbs with some pea-sized pieces. Stir in pecans.
Reduce oven to 350°F. Crumble topping around outer edge of pie. Bake an additional 30 to 40 minutes or until set in center and a knife comes out clean although it will be wet. Cool on wire cooling rack at least 4 hours before serving. Serve with whipped cream. Store in the refrigerator.
BAKER’S NOTES: Test for doneness about 1/2 inch away from pie’s center—the filling should look set and not jiggle. When pumpkin pie is baked too long, the crust will become soggy.
Thursday, November 18, 2010
Cranberries add Sparkle to Any Dinner
This is the time of year to stock up on cranberries. Hopefully there will be some specials this week and next, because like everything else, prices have risen. Take advantage and freeze a couple bags for later. Just place the unopened bags in the freezer. Don't wash the berries until you are ready to use them and use them frozen,there's no need to thaw.
The best news is that cranberries are high in antioxidants that help us to stay healthy. Scientists are discovering new compounds in cranberries and other fruits that slow the destruction of cells, also slowing aging. A half cup of cranberries also contains 10% of the RDA for vitamin C.
Probably Cranberry Nut Bread or Muffins and Cranberry Sauce, Relish or Chutney are the most familiar foods starring this brilliant red berry.
Here's another great recipe using cranberries from Baking Basics and Beyond.
Cranberry Walnut Tartlets
Be sure to try this with crème fraiche—the puckery cranberry filling of the tarts contrasts delightfully with the silky crème.
MAKES 8 TARTS
Crust
1 1/2 cups all-purpose flour
2 tablespoons sugar
1/2 teaspoon salt
1/2 cup cold butter, cut-up
3–4 tablespoons ice water
Filling
1 cup firmly packed brown sugar
2 tablespoons flour
1/3 cup light corn syrup
1 1/2 teaspoons vanilla
2 eggs, beaten
2 tablespoons butter, melted
3/4 cup chopped walnuts
3/4 cup chopped fresh or frozen, cranberries
1/2–3/4 cup crème fraîche (see page 290)
Heat oven to 350°F with oven rack in lower third.
Crust
Place flour, sugar, and salt in food processor bowl. Pulse about 5 times to mix. Add butter. Process until coarse crumbs form with some pea-sized pieces. Add 3 tablespoons ice water and process until dough begins to clump together. Process about 10 seconds. If large clumps do not form, add a little more water, 1 teaspoon at a time. Place dough on well-floured work surface, and gather it together into a ball.
Divide dough into 8 equal pieces. Press into bottoms of 8 (3-inch) tart pans. Press firmly against sides of pans. Extend the dough a little above the sides to prevent filling from sticking.
Filling
Combine brown sugar and flour in medium bowl. Add corn syrup, vanilla, and eggs. Whisk until mixture is smooth. No lumps of brown sugar or flour should remain.
Stir in butter, walnuts, and cranberries. Divide filling into prepared shells, using about 1/4 cup for each. Gently even out surfaces of the tarts so that nuts and cranberries are evenly spaced.
Bake 28 to 33 minutes or until knife inserted in center comes out clean. Crusts should be golden brown. Cool tarts on wire cooling rack. Remove from pans. Serve warm or at room temperature with crème fraîche.
BAKER’S NOTES: Place tarts on a jellyroll pan or cookie sheet lined with parchment paper in case filling runs over the sides.
Thursday, November 11, 2010
What OrganicProduce is Worth the Extra Cost?

Because organic foods tend to be more expensive, it makes good sense to make some economic choices. Buy organic for foods that traditionally carry pesticide residues such as apples, potatoes, lettuce, bell peppers, spinach, strawberries, carrots, peaches and nectarines. Although these foods can be peeled, many nutrients and some fiber are lost in the process.
Apples absorb pesticides more than other fruits so if you can't choose organic, peel them or look for apples from New Zealand where fewer pesticides are used.
Organic baby food doesn't contain chemical residues and is best for their delicate systems.
Because cows eat grains cultivated with pesticides, the milk and butter produced from these cows, will have some residues.
Even though you don't eat the rind on cantaloupe, this fruit easily absorbs pesticides. I am trying to remember to wash cantaloupe before cutting to prevent contamination but it's a new concept.
Cucumbers can contain pesticide residues inside and also in the wax used for preservation, so always remove the skin.
Grapes are treated with multiple chemicals, especially grapes from Chile. Look for domestic grapes.
Strawberries are one of the most contaminated fruits. Eat local berries in season to limit your exposure.
Winter squash absorbs dieldrin into its flesh but Mexican squash is dieldrin-free because the soil is free from it.
When you buy local you will know what you are getting. Organic is a step is a healthy directions.
Monday, November 1, 2010
Thanksgiving for Two
If there are only two at your Thanksgiving table this year, start a new tradition and roast a Cornish hen instead of a turkey. Cornish hens are the perfect size for two. Coarsely ground peppercorns and chopped thyme add flavor and color. Complete the meal with mashed potatoes and cranberry sauce. Kitchen twine can be used to tie the legs together but I've started using silicone cords that lock together and make it easy. After roasting the hen, remove the cords and wash them in the dishwasher and then you can use them again.
Lemon Thyme Roasted Cornish Hen
Serves 2
1 onion, cut into thick slices
1 (24 oz.) Cornish game hen, thawed
1 lemon, cut into wedges
2-3 sprigs fresh thyme
1 tsp. chopped fresh thyme
1 tsp. grated lemon rind
1 tablespoon butter, melted
Heat oven to 375 degrees F. Place onion on bottom of a small roasting pan (or use a small rack).
Remove the giblets and neck from the hen if necessary. Rinse and pat dry. Season the inside with salt and pepper. Stuff 2 lemon wedges and thyme sprigs into hen. Tie legs together and tuck wings under.
Combine chopped thyme with butter. Brush over hen. Season outside with salt and pepper. Place breast side up in roasting pan. Roast 30 minutes.
Baste with pan juices. Continue roasting 15 to 30 minutes until meat thermometer registers 160 to 165 degrees F. and juices run clear. Remove from the oven. Cover loosely and let stand 10 minutes so that the juices are reabsorbed.
Divide into two servings and serve breast meat and leg. Spoon the pan juices over the meat, if desired.
Food Safety: Always use a meat thermometer to judge the doneness of poultry. An instant read thermometer works well and is inexpensive but my favorite is a digital thermometer with a probe. Because the probe is inserted in the meat, when it registers the preset temperature it sounds an alarm. Insert the thermometer in the thickest part of the thigh, not touching the bone. To insure food safety, it is important to cook all poultry to 160 to 165 degrees F.
Friday, October 29, 2010
Scottish Food Adventure

There are two dinners that I want to write about before I move on from our Scotland trip. Wednesday night we ate at 63 Tay Street in Perth, listed as one of the top 10 restaurants in Scotland. We didn't know it but the meals was prix fixe (36 pounds) and consisted of five courses.
Two courses stand out in my memory. The amuse bouche was a shooter of orange granita, fresh orange slice and a sweet tender date.My first course was Jerusalem Artichoke Veloute with Diver Scallops. The veloute was velvety smooth and savory and scallops were briny sweet. This dish was the single best dish I had in Scotland.
Our final night in Edinburgh we feasted on seafood at the Cafe Royal. Just off of Princes Street, we would never have found it if we didn't have good directions. Parts of Chariots of Fire were filmed here and it is just what we all think an old pub should be- dark paneled walls and shining glassware surrounding an ancient bar.
We ate in the pub area and had our first taste of Cullen Skink with Abroath Smokie- this is a rich smoky chowder filled with smoked salmon and potatoes. Cafe Royal Fish Stew (photo above)and Traditional Beer Battered Fish and chips both were very good entrees. For the last time we ended with Sticky Toffee Pudding topped with a poached pear and ice cream. Good thing we did a lot of walking!!
Tuesday, October 26, 2010
Food in Scotland A Pleasant Surprise.
Aside from Scottish breakfasts which we were disappointing for B&B lovers, we had some fabulous meals in Edinburgh. Our first night we ate at Fisher's Bistro on the waterfront in Leith. It's always on the lists of top restaurants and was an easy walk from out hotel.
Because Scotland is almost surrounded by water, seafood is one of their most important industries. We started out with Fisher's Fish Soup, a creamy smoked salmon chowder with dill and chives that had a mild smoky flavor. My King Scallops from Skye had a hazelnut pesto, an herb salad and a balsamic drizzle. The scallops were delicate and fresh. We ended with one of our great discoveries for the trip- Sticky Toffee Pudding with Cream and Caramel Ice Cream. From this point on, we ordered this homey dessert every chance we got.
We had dinner the second night at The Dome, a restaurant in the New Town (1700's), located in an old bank building. The bar in the Club Room was buzzing and busy. I ordered the Herb Coated Fillet of Salmon with Green Beans and a Red Pepper Sauce and my husband had the Roast Chump of Lamb with Spiced Barley. Our entrees were accompanied with a dish of fresh vegetables to share.
Next posting I'll write about our meal at one of the Top 10 Restaurants in Scotland in Perth, slightly north east of Edinburgh.
Thursday, October 21, 2010
Starting the Day with a Scottish Breakfast

Shortly before we left for Scotland, a friend told me we would have the same breakfast at every B&B during our stay. I was surprised and really thought they'd be different as B&Bs in the states are very creative. She was right!!
At each of the four B&Bs where we spent the night we got "traditional Scottish breakfast". We couldn't believe it- it included a fried egg (fried in bacon fat), one or two strips of bacon (much meatier than ours), sausage (links or patties), toast, a grilled tomato half, a potato scone (similar to lefse and not what we consider a scone at all, mostly mashed potatoes, lightly fried)and baked beans.
We were well fed but somewhat disappointed, although we both liked the potato scone.
If I'm rambling, I'm still a little jet lagged!
Friday, October 8, 2010
More Apples
The leaves are 10,000 shades of gold, with a little scarlet and green. The temperature is going up to 70 today, unseasonably warm but no one's complaining. It's still autumn and apples are everywhere. I'm doing a lot of baking and have been using Honeycrisp, Braeburn and Golden Delicious. These are great apples for baking because they keep their shape and aren't too juicy.
Here's another favorite apple recipe.
Apple Praline Coffee Cake
When you prepare this coffee cake for a special occasion, arrange small pecan halves instead of chopped pecans on top to dress it up. Apples and brown sugar keep this cake moist for several days.
MAKES 12 TO 16 SERVINGS
1 1/2 cups chopped peeled apples (about 2 medium)
1/3 cup sugar
2 teaspoons cinnamon, divided
3 cups all-purpose flour
3 teaspoons baking powder
1/2 teaspoon salt
1 cup butter, softened
1 cup sugar
2 eggs, beaten
1 teaspoon vanilla
1 cup milk
Glaze
1/4 cup firmly packed brown sugar
1/4 cup butter
1 cup powdered sugar, sifted
2 tablespoons whipping cream or milk
1/2 cup chopped pecans
Heat oven to 375°F with oven rack in middle. Spray a nonstick 10-cup Bundt pan with nonstick spray or thoroughly grease and flour.
Combine apples, sugar, and 1 teaspoon cinnamon in medium bowl. Combine flour, baking powder, remaining 1 teaspoon cinnamon, and salt in another medium bowl.
Beat butter in bowl of a heavy-duty mixer on Medium speed until creamy, scraping down sides of bowl once or twice. Gradually add sugar and continue beating until light in color. Scrape down sides of bowl. Beat in eggs and vanilla.
Reduce mixer speed to Low and add the flour mixture in three additions, alternating with two additions of milk. Scrape down bowl after each addition. Beat until smooth.
By hand, stir in the apple mixture. Spoon the batter into prepared pan, and spread evenly with a metal spatula.
Bake 45 to 60 minutes or until a toothpick inserted in center comes out clean. The apples should be fork-tender. Cool on wire cooling rack 15 minutes and remove cake from pan (see Baker’s Notes below).
Glaze
Heat brown sugar and 1/4 cup butter in small saucepan over medium heat, bringing mixture to a boil while stirring constantly. Reduce heat to low and cook until butter is absorbed, about 1 minute. Remove from heat and add whipping cream and powdered sugar. Beat until smooth.
Drizzle glaze over cake, allowing some to run down the sides. Sprinkle with pecans.
BAKER’S NOTES: Spray the Bundt pan generously with nonstick cooking spray or grease with shortening and coat with flour. Make sure the ridges are coated so the cake will come out completely.
Use a metal spatula to release the center and loosen the sides of the cake from the pan. With the cake side up, gently shake the pan to loosen the bottom, rotating as you shake. Carefully remove the cake from the pan by inverting it onto a cooling rack.
Because the glaze is cooked, it sets up quickly. As soon as it is smooth, drizzle it over the cake.
It's Apple Time

Wednesday I was on Showcase MN and prepared Apple Bars with Browned Butter Frosting and Apple Cheddar Muffins. Developing recipes for Scandinavian Classic Baking I found a few that used browned butter and I love the flavors.
Here's the link. http://www.showcaseminnesota.com/show/client_article.aspx?storyid=876046
Friday, October 1, 2010
Butter is Better

Earlier this week I attended the Edesia Cookbook Discussion group founded by Emmy winner Kim Ode. Her guests were Zoe Francois, author of Artisan Bread in 5 Minutes a Day, and Heidi Woodman, of Heidi's Restaurant. The discussion was about baking and their go to cookbooks.
Several they recommended: Rose's Heavenly Cakes, Ratio by Michael Ruhlman,Dessert Fourplay by Iuzzini and Finamore, On Food and Cooking by Harold McGee and The Last Course by Claudia Fleming of NY's Gramercy Tavern. Heidi said her most used "go to" book was The Joy of Cooking, it has the basic information everyone needs at some time. Good ideas for holiday gifts to bakers.
In the discussion about ingredients there were two important points.
1. always use unsalted butter (you can control the amount, but salt is essential)
2. Special salts make fabulous finishes, such as smoked salt on chocolate sorbet with pears.
Friday, September 24, 2010
Fall Weather Arrives
Actually fall arrived here Wednesday and announced its presence with 24 hours of rain, almost 3 inches in our rain gauge. There has been serious flooding in parts of Minnesota and Wisconsin. Today it the rain has stopped but it is cooler and windy. Definitely time for soup!!!
Here's recipes that is easy to make and bursting with healthy lentils and savory fall vegetables. I've also used chopped ham instead of the sausage. Add a little sherry and you'll feel warm and toasty for sure.
Lentil Sausage Soup
Serves 6 to 8
2 tbsp. olive oil
1 cup chopped onion
1 cup chopped celery
1 cup chopped carrots
1 leek, cleaned and chopped
1 ½ cups lentils
2 tbsp. tomato paste
2 tsp. chopped fresh thyme
½ tsp. kosher salt
½ tsp. pepper
5 cups chicken broth
2 cups water
1 to 2 tbsp. balsamic vinegar
½ lb. diced kielbasa or smoked sausage
Sherry
Heat the olive oil in a large Dutch oven and add the onion, celery, carrots and leek. Cook until softened, stirring occasionally, about 5 to 7 minutes.
Stir in the tomato paste, thyme, salt, pepper, chicken broth and water. Bring mixture to a boil. Cover partially, reduce heat to low and simmer 30 to 40 minutes or until the lentils are tender.
Add the kielbasa and simmer 10 minutes. Season to taste. Stir in vinegar. Adjust seasoning.
Add sherry to the soup when serving, if desired.
Tuesday, September 21, 2010
Baking with Yeast

Since I posted two recipes recently using active dry yeast I thought it would be helpful to talk about yeast and yeast breads. I have always loved bread and enjoyed making it. It actually doesn't require a lot of active time. Once the dough is made, you need a few minutes to shape it. After it rises a second time, it's time to bake.
Using my Kitchen Aid mixer to knead the dough makes the whole process even easier. After making the dough I switch to the dough hook and "knead" the dough about 3 minutes. After this, I place the dough on a lightly floured counter and knead it a minute or two. When it is smooth and elastic it's ready for rising.
Here's some info on yeast!
The most important step in baking yeast breads is using the proper temperature of water to activate the yeast. Because yeast is a living organism, it is easily killed by excess heat. When adding yeast directly to warm water, the water temperature should be between 105 and 115 degrees F. Use a thermometer to measure the water temperature to insure that the yeast is not killed.
Test warm tap water by sprinkling a few drops on the inside of your wrist. If it feels warm to you it is a perfect temperature for yeast. Adding warm water to yeast is called proofing because the yeast will begin to grow and produce gas “proving” that the yeast is alive. After opening yeast, store any remaining in the refrigerator and use by the date indicated on the package. Yeast past its expiration date won’t produce gas to leaven the dough.
Saturday, September 18, 2010
Thoughtful Eating

The USDA Food Pyramid has always been criticized because it isn't easy to use. In 2010 new Diet Guidelines for Americans is being published. Will this be more successful? We have to wait and see.
The number one nutritional concern in the U.S. today is obesity. And the best way to decrease this serious health risk is through diet. I read an article on the Nourish Network about topics that are included in the new recommendations.
Some of the topics that part of the discussion include:
Plant based diets need to become everyday diets- this means eating more vegetables, fruit, whole grains and nuts.
Two servings of seafood should be consumed each week. Low fat and fat-free milk products are important dietary components.
Decrease consumption of meat, poultry and eggs.
Eat attentively. Carefully consider what you are consuming.
Learn to cook. By preparing food at home, fat, portion sizes and content are within your control. Does this mean "Home Ec" will be back in the schools? It should never have been dropped.
Wednesday, September 15, 2010
"Crash Night"
When my kids were younger we'd have crash night on Fridays when we weren't off to other activities. that meant pizza and movies. Here's a recipe from Baking Basics and Beyond for a simple and great pizza crust. You your favorite toppings or those below. .
Basic Pizza
Homemade crust makes “pizza night’ an occasion the whole family will look forward to. Spread the sauce on the pre-baked crust and let everyone choose his or her own toppings. When I only need one pizza, I pre-bake the second crust and freeze it. With a crust from the freezer, homemade pizza arrives faster than delivery!
MAKES 2 (12-inch) PIZZAS
basic pizza Crust
1 (1/4-ounce) package active dry yeast
1 cup warm water (105–115°F)
3 cups all-purpose flour, divided
1 tablespoon sugar
1/2 teaspoon salt
1 tablespoon olive oil
Topping
1 (15-ounce) can pizza sauce
2–3 cups shredded mozzarella cheese
�Pizza toppings: cooked Italian sausage, chopped green peppers, sliced mushrooms, olives, etc.
basic pizza Crust
Sprinkle yeast over warm water in small bowl and let stand about 5 minutes. Combine 2 1/2 cups flour, sugar, and salt in large bowl. Stir in yeast mixture and olive oil. Continue stirring until flour is absorbed. Stir in remaining flour until a soft dough is formed. Dough will be sticky to start with, but after kneading it becomes easier to handle.
Place dough on well-floured surface and shape it into a ball. Place your fingers on top of dough ball, curled slightly, and pull dough toward you; then push it away, using palms of your hands. Turn dough 1/4 turn and repeat. Knead dough 6 to 8 minutes or until it is smooth and elastic.
To judge whether dough has been sufficiently kneaded, place it on work surface, pull both ends gently, and release. Dough should be elastic and spring back. Little blisters of air should be visible just under the surface.
If dough is sticky, gradually add flour while kneading. Do not use more than 3 cups flour, total. Shape dough into a ball by pulling sides underneath forming a smooth top. Cover dough and let it rest while you prepare toppings. I just invert a bowl over the dough for this short rest.
Heat oven to 450°F. For crispest crust, place rack toward bottom of oven.
Grease two 12-inch pizza pans. Leave about 1 inch around edge of each pan ungreased so dough has something to cling to as it is stretched to fill pan. Place half of dough in center of each pan, and push it out to pan edges, rotating pan as you go. Form a raised edge around the crust’s perimeter.
Bake crusts 7 to 10 minutes or until they are just beginning to brown. Remove from oven. (The crusts can be frozen at this point. Cool to room temperature and wrap tightly before freezing.)
Topping
Spread 1 cup pizza sauce over each crust and add toppings. Sprinkle 1 to 1 1/2 cups shredded mozzarella cheese over each pizza. Bake 7 to 10 minutes longer until cheese is melted and crust is browned. Cool slightly before cutting.
Thursday, September 9, 2010
It's Football Season!
We left town for the Labor Day Weekend and came home to fall. Certainly seems like summer left our area. But I love fall for the cool days and nights, colorful falling leaves and football.
Here's a recipe that makes a great snack for halftime or make it dinner by adding a salad. The Stromboli recipe is fromBaking Basics and Beyond.
Stromboli
Stromboli is another family favorite, and that’s why I’ve included this recipe. I don’t put pizza sauce inside so the meat and cheese flavors will predominate. I’ve served this for dinner, but it makes a popular snack when everyone is gathered for the big game. You can use various deli meats and cheeses and add olives or hot peppers—just don’t fill the stromboli too full. Provolone, a mild Italian cheese with a smoky flavor, is perfect here.
MAKES 12 TO 15 SERVINGS
Basic pizza crust (make your own or use refrigerated or frozen)
1 tablespoon olive oil
1/4 pound sliced pepperoni
1/4 pound sliced hard salami
4 ounces Provolone cheese, sliced or shredded
1 egg, beaten
Grated Parmesan cheese
Marinara sauce
Heat oven to 400°F with rack in lower third. Lightly grease a cookie sheet.
Place dough on lightly floured surface and roll out to a 15 x 12-inch rectangle. If dough becomes difficult to roll, let is rest briefly.
Brush dough with olive oil. Arrange pepperoni, salami, and Provolone cheese down center of dough. Fold both sides toward the center and pinch together to seal. Brush egg over top of dough. Sprinkle with Parmesan cheese and place on prepared cookie sheet. The easiest way to lift the dough is with large metal spatulas at each end. Cut several slits into dough.
Beat 30 to 35 minutes or until stromboli are well browned. Cool slightly before slicing. Serve with pizza or marinara sauce for dipping.
BAKER’S NOTE: Cover the baking sheet with a silicone baking mat for easy clean-up since leaks do occur.
Tuesday, September 7, 2010
CSAs- Sources of Best Local Produce

This is the best time of year to be in a CSA (community supported agriculture). Tomato plants are bending under the weight of ripening tomatoes and basil plants are adding fragrance to the field. When we visited my daughter in Upstate New York in addition to the box they pick up every week, the farm also has "pick-your-own" that varies from week to week. My grandson loves to be outdoors and was very helpful picking yellow beans.
This weeks' box container Brussels' sprouts tops which were unknown to me. They are actually the leafy part of the plant and a dark green- attention: healthy!
Saturday morning we headed to the farm in the gently rolling countryside. Along the way we saw cows, alpacas and chickens. Also wind machines on top of the hills. As we left New York, the fragrance of fresh tomato sauce with basil was in the air and I knew we were leaving too soon!
Monday, August 23, 2010
Timely Info on Eggs
With the recall of millions of eggs, it's time to review egg safety and quality. The USDA recently release a study comparing the nutritional value of "factory eggs", uncaged eggs and organic eggs.
The scientific study found that organic or uncaged eggs were no healthier than factory eggs. What is especially interesting is that the factory eggs were safer to eat! So choosing eggs from organic or uncaged chickens is a moral and ethical choice, not a nutritional issue.
Organic eggs haven't been studied for antibiotic content but in general, organic chickens are not dosed with antibiotics unless they are sick, and lose organic designation in this case. Organic eggs were higher in PCB's that factory eggs.
With the recent recall, the important factor is that when the eggs were found to contain salmonella, it was possible to locate the source and make changes.
Don't let eggs stand at room temperature more than 2 hours. Cook foods containing raw eggs to 160 degrees F. and refrigerate foods containing eggs withing two hours. The key to avoiding salmonellosis is safe handling of eggs and egg products.
Friday, August 13, 2010
Everything's Peachie!
Yesterday I taught a peach class at Byerly's Cooking School. Joan Donatelle from Byerly's assisted me and provided Bellinis made with fresh peaches and prosecco for the students. After that the class went very well!
Here's another peach recipe I developed this summer. Just got peaches from the farm stand that are very sweet and juicy and perfect for pizza.
Peachy Pizza on the Grill
Makes 8 servings
2 (3 ounces) packages cream cheese, softened
1/2 cup firmly packed brown sugar
2 tablespoons sugar
1/2 teaspoon cinnamon
4 medium peaches, peeled and sliced
1 tablespoon lemon juice
1 can (13.8 ounces) refrigerated pizza crust
Ice Cream or whipped cream
Prepare toppings before grilling the crust. Combine the cream cheese and brown sugar in a medium bowl and mix until smooth. Mix the sugar and cinnamon in a small bowl. Peel the peaches and brush with lemon juice to prevent browning.
Unroll the pizza crust onto a floured surface and cut into 4 parts. Flatten each part to a rough square about 6 to 7 inches. The shape may be uneven but this isn’t a problem.
Heat a grill to high. Place one pizza on a greased baking sheet and lightly spray one side of a crust with nonstick cooking spray. Place sprayed side down on grill. Grill 2 to 3 minutes and remove crust. If it sticks, wait 1 minute and try again.
To serve at once, spread 2 to 3 tablespoons cream cheese onto cooked side of crust. Top with peaches and sprinkle with cinnamon sugar.
Return to the grill and cook 2 to 3 minutes or until hot and lightly browned. Cool slightly before serving. Repeat with remaining dough. Serve with ice cream or whipped cream.
Pat’s Tips: You can grill the crust and finish later in the broiler. After the first side of crust is browned, turn and continue grilling until crust is browned. Just before serving, add toppings to crusts.
Place under broiler for 3 to 4 minutes or until heated and lightly browned.
If you haven’t grilled pizza before, experiment with your grill to find the right settings and timing.
Thursday, August 5, 2010
It's time for Peaches

Yesterday I appeared on Showcase MN on KARE 11. As always I felt very welcome and that makes it easy to talk. Here's the link. I'm also posting the recipe here for Peaches Melba Upside Down Cake.
http://www.showcaseminnesota.com/show/client_article.aspx?storyid=863622
Peach Melba Upside Down Cake
Peach Melba was created to honor Dame Nellie Melba, an Australian opera singer. Now a classic, any dessert containing peaches and raspberries is named peach Melba. In the summer juicy ripe peaches and tangy-tart raspberries contrast with the caramelized topping and tender cake. A little whipped cream makes it complete.
MAKES 9 SERVINGS
Topping
1/4 cup butter, melted
2/3 cup firmly packed brown sugar
2 medium peaches, peeled and sliced
1 tablespoon lemon juice
1/2 cup fresh raspberries
Cake
1 1/4 cups all-purpose flour
1 cup sugar
1 1/2 teaspoons baking powder
1/4 teaspoon salt
1/2 cup butter, room temperature
2 eggs, lightly beaten
2 tablespoons milk
1 teaspoon almond extract
Heat oven to 350°F with rack in middle.
Combine melted butter and brown sugar in bottom of 9 x 9-inch baking pan. Toss peaches with lemon juice and add to pan. Add raspberries.
Combine flour, sugar, baking powder, and salt in bowl of a heavy-duty mixer. Add softened butter, eggs, milk and almond extract and beat on Low speed until well mixed. Scrape down sides of bowl.
Increase mixer speed to Medium and beat 2 minutes. Pour batter over the fruit spreading into the corners.
Bake 40 to 48 minutes or until cake springs back when touched lightly. You can test with a toothpick, but only insert it into the cake. Remove cake from oven and cool 5 minutes on wire cooling rack.
You need to remove cake from pan while still warm so topping will come out easily. Loosen edges of cake with small metal spatula and cover cake with a serving plate. Carefully invert the cake onto the serving plate. If any topping remains in pan, remove with spatula and gently spread over cake.
Serve warm or at room temperature. Store cake in refrigerator.
Saturday, July 24, 2010
Some of my friends have been complaining recently that they have too much rhubarb. That's not my problem because I don't have enough sun in my yard to make it grow, so I have to buy it. But now I know who to ask when I need some.
If you are overwhelmed with rhubarb here's a mouth-watering pie that is different from usual . A friend brought it to our Gourmet Group dinner and everyone thought it was wonderful.
Rhubarb Pie
Makes 8 servings
1 pastry for 9-inch pie pan
Filling
2 slices soft white bread, crust removed, cubed
1/4 cup butter, melted
1 1/2 cups sugar
3 tablespoons all-purpose flour
2 eggs, well beaten
3 cups diced rhubarb
Press the pastry into the pie pan and flute the edges. Heat the oven to 350 degrees F.
T make the filling, toss the bread cubes with the butter until bread is well coated and place in the pie pan.
Combine the sugar and flour in a medium bowl. Stir in the eggs and mix well. Stir in the rhubarb. Pour on top of the bread.
Bake 55 to 65 minutes or until a knife inserted in center comes out clean. The crust should be golden brown. Cool the pie on wire cooling rack. Remove from pans. Serve warm or at room temperature with vanilla ice cream.
Wednesday, July 14, 2010
Bastille Day- Italian Food?

I met a friend for lunch today at Parma 8200, a new restaurant in the south metro area. It is another D'Amico run restaurant and adds successfully to their chain of local favorites.
For a lunch crowd the restaurant was very busy and unfortunately, loud.
We started with squares of chewy toasted bread soaked in olive oil. I had a Shrimp and Arugula Salad with Tarragon Vinaigrette. The shrimp were small but sweet and tender and were surrounded with the best of fresh summer produce. Fresh sweet corn, tiny asparagus spears, avocado wedges and succulent grape tomatoes were lightly dressed with tarragon vinaigrette, the perfect complement.
Although the salad was by no means a pasta salad it did include frego, tiny pasta balls.
I plan to return here soon!
Friday, July 2, 2010
Lunch with a View

When my husband and I were in Chicago we had lunch at the Art Institute in their modern wing. The Piano Restaurant has outdoor seating under an artistic canopy. The end of the terrace is all glass and as you eat carefully prepared dishes you gaze at Millennium Park. The view is so extraordinary that it's hard to think about food. My husband had a trio of "sliders", beef, lamb and shrimp. I had ravioletto with wild mushrooms in mushroom broth.
Of course, the part that captured most of my interest was dessert. I devoured a Pistachio Cake with Strawberry Consomme and White Chocolate Ice Cream. The strawberry consomme was poured over the cake just before it was served. Beautiful with fresh local berry flavor bursting forth.
Friday, June 25, 2010
Food Stylying Advice from Delores Custer
I've signed a contract with Pelican Publishing to create Scandinavian Classic Baking which will be published in spring, 2011. In addition to developing the recipes I'm also going to be the stylist for many of the photos. There's a photo of every recipe. I know just enough about styling food for photo to know how much I don't know and that it takes an alchemists magic for success.
That leads me back to Delores. I actually met her years ago when she was in Minneapolis for Food on Film, sponsored by the Twin Cities HEIB. I know how much respect she has in the industry and was delighted when she published Food Styling- The Art of Preparing Food for the Camera.
In her 400 page generously illustrated book she covers how to become a food stylist and the importance of food skills in success. In addition she give specific tips for many kinds of food and the ethics involved in showing products honestly. There are many photos showing the same food surrounded by different colors, lighting and props. Beautiful food isn't enough, you must develop an eye.
In addition she provides lists of equipment, tips on selecting produce and much more. My favorite part is the stories she tells of specific shoots and what was involved; she prepared the food held by Paul Newman in a promotion for Newman's Own Diablo Sauce. It was smokin' and so was he, surrounded by fire.
This book is worth the investment for anyone who wants to take great shots of food.
Friday, June 18, 2010
Father's Day Favorite
Father's Day oincides with fresh blueberry season almost every year. Because blueberries are abundant, it's a perfect time to bake a blueberry tart. This recipes has been a favorite of mine since I first baked it in the 70's. Because some fresh blueberries are added after baking, their freshness is accented.
It's very easy to bake because the crust is pressed into the pan- you don't have to roll out a pastry dough which can be challenging. Try it and I think you'll agree.
Blueberry Tart with Vanilla Whipped Cream
If you're new to baking you'll like this crust because it is made in the food processor and pressed, not rolled, into the tart pan. Lightly dust your fingers with flour if the pastry is sticky. I like to sift a little powdered sugar on top of the tart after it has cooled. For a special touch top with whipped cream or ice cream.
MAKES 8 SERVINGS
Crust
1 cup all-purpose flour
2 tablespoons sugar
1/4 teaspoon salt
1/2 cup butter, cut-up
1 tablespoon distilled white vinegar
Filling
3 cups fresh blueberries, divided
3/4 cup sugar
2 tablespoons all-purpose flour
1 teaspoon cinnamon
Heat oven to 400°F with oven rack in middle.
Crust
Combine flour, 2 tablespoons sugar, and salt in a food processor bowl. Add butter and pulse until dough resembles coarse crumbs with some pea-sized pieces. With processor running, add vinegar. Process until dough starts to clump together, about 10 seconds.
Gather dough into a ball and place in center of a 9-inch tart pan with removable bottom. Using your fingers, press dough out to the edges of the pan and up the sides. Lightly dust your fingers with a little flour if dough is sticky.
Filling
Sprinkle 2 cups blueberries into the tart shell.
Combine sugar, flour, and cinnamon in small bowl and mix. Sprinkle evenly over the blueberries.
Bake 50 to 60 minutes or until filling is bubbling and sugar has dissolved. Remove tart from oven and press the reserved 1 cup of blueberries into the warm fruit. Cool on wire cooling rack at least 2 hours before cutting.
Chill Vanilla Whipped Cream until serving time, then mound over tart.
BAKER’S NOTES: The filling must be bubbling all over in order to dissolve the sugar.
SECRETS TO SUCCESS: The acid in the vinegar helps make the pastry tender. The vinegar flavor completely disappears during baking.
Friday, June 11, 2010
Whole Grains Salads
Here's the link from my TV appearance.
http://www.showcaseminnesota.com/show/client_article.aspx?storyid=852665
Today I prepared whole grain salads on Showcase Minnesota. I was worried that I wouldn't have enough to fill the time but as usual I have more than enough. I discussed the importance of whole grains and prepared a Wheat Berry Salad.
Tonight I could actually serve 3 whole grain salads for dinner but think that's a bit much. We're going to grill some chicken.
Here's a recipe for Blueberry Rhubarb Crumble from Baking Basics and Beyond. It will complete the summertime menu.
Blueberry Rhubarb Crumble
Fresh, sweet blueberries tame the tartness of rhubarb in this British crumble. Rhubarb is traditionally a sign of spring, and I always buy extra when I go to the farmers’ market or find it at the supermarket. It can be frozen without washing or trimming but should be tightly wrapped.
MAKES 8 SERVINGS
1 1/2 cups sugar
3/4 cup all-purpose flour, divided
1 teaspoon cinnamon
6 cups chopped fresh rhubarb
1 1/2 cups fresh blueberries
1/4 cup orange juice, or water
Topping
1/2 cup firmly packed brown sugar
1/4 cup cold butter, cut-up
Heat oven to 350°F with oven rack in center. Spray bottom of a 9 x 9-inch baking dish or 1 1/2-quart casserole with nonstick cooking spray.
Mix granulated sugar with 1/4 cup of flour and cinnamon in large bowl. Add rhubarb, blueberries, and orange juice and stir until fruit is well coated. Be careful not to break the blueberries. Spoon into prepared baking dish.
Bake 30 minutes or until juices are starting to thicken and bubble.
Topping
Mix remaining 1/2 cup of flour with the brown sugar. Cut in butter with a pastry blender until mixture resembles coarse crumbs with some pea-sized pieces. Crumble over the hot fruit.
Bake 25 to 35 minutes longer or until juices are bubbling and rhubarb is fork-tender. Cool on wire cooling rack.
Serve warm or at room temperature. Store any remaining in refrigerator.
BAKER’S NOTE: Because frozen rhubarb and frozen blueberries are available throughout the year, this dessert can be baked any time. When you are using frozen rhubarb, I suggest chopping the largest pieces. Use the rhubarb and blueberries while still frozen. After adding the topping, you will need to bake about 60 minutes longer.
SECRETS TO SUCCESS: When I serve this dessert warm, I offer it with a little cream.
Friday, June 4, 2010
Pizzaria Bianco- Worth the Wait?


We just returned from Phoenix and finally managed to eat at Pizzaria Bianco in downtown. We gave in and waited almost 3 hours for a table. I have never waited that long for anything!!
We arrived at 4:05 for the 5 p.m. opening and were too late to be in the first seating. We learned this at 5 p.m. after the doors opened and the line slowly moved forward. We were the first group that had to continue waiting. Don't forget, it was Phoenix and the temperature was at least 99 degrees F.-- but it's a dry heat and there was some shade. My son was the one who stood patiently in line.
There's a bar in the house next door and we were able to wait inside and have a drink and appetizers. Probably because we had a 7-year old and a 4-year old with us, we had a room to ourselves and had a nice visit while we waited.
Our appetizer was Bruschetta, toasted bread spread with a mild goat cheese and drizzled with olive oil and a little basil. Quality ingredients and very simple!!
We were seated around 7 p.m. and the food came quickly after that. I ordered my favorite Pizza Margarita. The crust was crisp and chewy and toppings were fresh and everyone at the table devoured their pizza.
Was it worth a 3 hour wait? I didn't think it was any better than Punch Pizza in the Twin Cities but maybe I was just disgruntled from the long wait. For me, I think it's all about the wait!
Tuesday, May 25, 2010
Easy Ways to Add Whole Grains
The following are whole grains that can easily be added to your diet.
· Barley
· Brown rice
· Buckwheat
· Bulgar (also called cracked wheat)
· Oatmeal
· Popcorn
· Quinoa
· Whole wheat pasta or cous cous
· Wild rice
Serve brown rice in place of white rice. Because it takes longer to cook, I usually prepare 4 servings at a time in my rice cooker and reserve the extra for another meal or freeze it.
Start your day with a whole grain cereal such as oatmeal. Instant oatmeal usually contains added sugar.
Instead of rice, add barley or wild rice to hearty nourishing soups. Hulled barley is the most nutritious form. Pearled barley has had the husk removed and cooks faster. Barley is high in fiber and adds a chewy texture to soups.
Whole-wheat cous cous is one of my favorites. It’s a whole grain version that is quickly prepared and has a mild nutty flavor. I’ve always used cous cous often because it’s ready in 5 minutes.
When you bake, replace some all-purpose flour with whole-wheat flour. Start with substituting small amounts and gradually increase it. I don’t recommend using more that half whole-wheat flour because the end results will be dry and heavy.
Curried Cous Cous
Whole wheat cous cous has great nutritional value. Depending on the main dish, I often add chopped peanuts and a few raisins if I’m serving this with a simple entree. This is the perfect side dish for grilled chicken or salmon.
Makes 2 servings
1 cup chicken broth
1/3 cup whole wheat cous cous
1/4 cup frozen peas
1/2 teaspoon curry powder
1/4 teaspoon coarse salt
1 tablespoon chopped fresh parsley
Heat the chicken broth to a boil in a small saucepan. Add the cous cous, peas, curry powder and salt. Let stand about 5 minutes or until the broth is absorbed. Add parsley and fluff with a fork.
Healthy Whole Grains
Whole grains are an important part of a healthy diet. In addition to being low in fat and high in fiber, recent studies have shown diets high in whole grains reduced risk of strokes, type 2 diabetes and heart disease.
Rice, cereal, pasta and flour are grains or made from grain products and make up a large part of our diets. The complex carbohydrates contained in whole grains are digested slowly and adding to satiety. Quickly digested flour and sugar from white bread, pastries and rice don’t provide the same filling satisfaction as whole-wheat bread or brown rice. Whole grains actually contain higher amounts of protective antioxidants than fruits and vegetables.
Because the germ contains some fat, whole grain foods spoil more quickly than refined but you can extend shelf life by storing them in the freezer or refrigerator. Removing the bran and germ gives refined grains a lighter color and texture. Many refined grains such as flour are enriched with B vitamins and iron but are still not as nutritious as the original whole grains.
It’s easy to become confused as to what products are actually contain whole grain. Many “multi-grain” foods don’t actually contain any whole grains at all. The word “whole” should be in front of the first grain, or another word such as oats, brown rice or wild rice should be the first item on the nutritional label. Terms such as “cracked wheat”, “wheat flour” or “stone-ground” do not guarantee whole grain. Try to select whole grain foods that provide at least 3 g of fiber per serving. “Whole grain” is often displayed on the front of the package.
My next posting will suggest ways to add whole grains to your diet and include a whole grain recipe.
Saturday, May 22, 2010
Springtime Rhubarb
One of the advantages of living in a northern climate is the ability to grow rhubarb in the garden. I put in a plant last summer but have meager results and now realize that having a lovely shaded lot, also means lack of sun for plants. I'm not much of a gardener, but rhubarb doesn't require much.
Fortunately a friend had rhubarb run amok and brought me a couple of pounds of stalks plus a Fresh Rhubarb Pie. A tart and tangy springtime treat!
I'm making Rhubarb Bread and will freeze any leftover stalks. After cutting off the leaves (they are poisonous!) and cutting the stalks into 1/2 inch pieces, place it in air-tight containers and freeze. When I use it, I can use it still frozen which is why it make sense to cut it up before freezing.
Rhubarb Bread
Although fresh rhubarb is available only in the spring, frozen rhubarb is available year round. Look for fresh rhubarb at farmers’ markets and supermarkets early in the spring. In this quick bread the tart flavor of the fruit contrasts with the spiciness of the nutmeg.
MAKES 1 LOAF (12 to 16 slices)
2 1/2 cups all-purpose flour
1/4 cup sugar
1 teaspoon baking soda
1/2 teaspoon salt
1/2 teaspoon grated fresh nutmeg, if desired
3/4 cup firmly packed brown sugar
1 cup lowfat buttermilk
1/2 cup vegetable oil
2 eggs, beaten
1 1/2 cups fresh or frozen chopped rhubarb
Heat oven to 350°F with oven rack in middle. Lightly spray bottom of a 9 x 5-inch loaf pan with nonstick cooking spray.
Combine flour, sugar, baking soda, salt, and nutmeg in a large bowl. Make a well in center of the flour by pushing ingredients out toward sides of bowl.
Combine brown sugar, buttermilk, oil, and eggs in medium bowl, breaking up any small lumps in the brown sugar. Pour buttermilk mixture into the flour mixture, and stir only until the flour is evenly moistened even though batter is not smooth.
Stir rhubarb into the batter, pour into prepared pan, and smooth top. The pan will be about 3/4 full, but it won’t overflow.
Bake 55 to 70 minutes or until golden brown and a toothpick inserted in center comes out dry. The bread may begin to pull away from pan sides.
Cool on wire cooling rack 10 minutes. Run a spatula around sides of pan to loosen bread. Place rack over the bread and invert so bread falls onto the rack. Remove pan and turn top side up. The bread must cool before it can be sliced.
BAKER’S NOTES: Like any quick bread, this bread is easier to slice the second day. After cooling completely, wrap in plastic wrap and store at room temperature overnight.
As a substitute for buttermilk, you can place 2 teaspoons lemon juice or distilled vinegar in a glass measuring cup and add milk to make 1 cup. Let the mixture stand a couple of minutes.
SECRET TO SUCCESS: Frozen rhubarb doesn’t need to be thawed before baking but does need to be chopped because the pieces are very large. Use a sharp knife, and chop it while it is still frozen. Do not use a food processor because it makes the rhubarb stringy.
From Baking Basics and Beyond by Pat Sinclair, 2006, Surrey Books
Monday, May 17, 2010
Springtime Morels
At the Farmer's Market last week I purchased some morel mushrooms. The farmer told me it was probably the last time she'd have them this year so I was lucky to get them.
I put a lot of thought into the best way to serve and and as a result we had two outstanding dinners. Wednesday night I prepared a recipe from May Ellen Evans cookbook, Bistro Chicken. In typical fashion I made some changes and substituted boneless skinless chicken breasts for chicken parts. After simmering about 8 minutes the chicken was tender and moist and the mushrooms added a woodsy flavor. A silky sauce added to the earthy richness of the dish.
(To buy Mary's book go to www.thewritecook.com )
Saturday night we hosted our Gourmet Group and I took relished the opportunity to use recipes from my "Cooking with Cabernet" class at Sur l'Table in San Francisco. After soaking the morels I combined them with button mushrooms and sauteed both in butter. Rare Fillet Mignon prepared on the grill were with an Onion Marmalade from the class. To make the marmalade, I slowly simmered sweet onions with a bottle of Cabernet Sauvignon and 1 cup of port until the juices were thick and syrupy. Roasted new potatoes and steamed broccoli with lemon olive oil and sea salt completed my portion of the meal.
My friend brought Rhubarb Pie made with rhubarb from her garden and also gave me a bunch of rhubarb- stay tuned for my next posting!
Tuesday, May 4, 2010
Cake Decorating for Fun

 Saturday I spent the day at a decorating class sponsored by Wilton School of Decorating Art. Sandy Folsom, school director, shared decorating techniques with a group of Twin Cities professionals.
I'll admit that we were given a bag of Wilton products for practicing. For me, as a baker, it was a special treat because I usually take the simplest road and don't do much decorating. Nancy Siler, Vice President of Consumer Affairs, said her philosophy is "Make it simple and people will want to try it". For me, that was what the day was all about.
We produced the cakes above in about an hour after practicing with a pastry bag. I think you can tell which groups had a food stylist but everyone had fun and all cakes received a prize for something. Our generous judges awarded my team "Best Use of Border", a reach!!!
From now on, I'm going to take a little time to decorate.
Tuesday, April 27, 2010
Pie for Derby Day, Kentucky That Is
This week there's lots of talk about Cinco de Mayo but an American tradition, the Kentucky Derby, is also this week. Saturday at 5 pm the horses are running for the roses in Louisville.
Although I've not attended the Derby I do like the traditional foods served that day. Mint Juleps are made with Kentucky bourbon and the same bourbon flavors many Classic Pecan Pies.
"Derby Pie" is a registered trademark of Kern's Kitchen in Prospect, KY and is made from a secret family recipe created in the 1920s.
This recipe is from Baking Basics and Beyond.
Chocolate Pecan Pie
Toasting the pecans really enhances their nutty flavor. Toast the pecans while you prepare the filling. The bourbon is optional—omit it if you prefer.
MAKES 8 SERVINGS
Crust
Pastry for a 9-inch single-crust pie
Filling
3/4 cup sugar
1 cup light corn syrup
3 eggs, beaten
1/2 teaspoon salt
1/3 cup butter, melted
1 tablespoon Kentucky bourbon, if desired
1/2 cup semisweet chocolate chips
1 1/2 cup pecan halves, toasted
Topping
1 cup whipping cream
2 tablespoons powdered sugar
2 tablespoons Kentucky bourbon, if desired
Heat oven to 375°F with oven rack in lower third.
Crust
Roll out pastry into an 11-inch circle. Loosely roll dough around rolling pin and lift it into 9-inch pie pan. Unroll and press dough into pan edges and bottom, making sure that the pastry is not stretched.
Filling
Combine sugar, corn syrup, eggs, and salt in medium bowl, and beat with a wire whisk until smooth. Slowly stir in butter and rum (if using) and mix well. Stir in chocolate chips and pecans and pour filling into prepared crust.
Bake 40 to 50 minutes or until filling is set except for 1-inch diameter section in center of pie. You can test this using a knife, which should come out clean but will be wet.
Cool on wire cooling rack about 2 hours before serving.
Topping
Beat whipping cream on High speed in bowl of a heavy-duty mixer fitted with the whisk until soft peaks form. Scrape down sides of bowl and add powdered sugar and rum (if using). Beat until sugar is dissolved and stiff peaks form. Chill until serving.
Place a dollop of whipped cream on each piece of pie before serving. When I serve this warm, I usually accompany it with ice cream.
Monday, April 19, 2010
Seasonal Favorites for Meatless Meal
The appearance of tender pale green stalks of asparagus in the supermarket is always one of the first signs of spring. Fresh halibut, available from March to November, starts to appear about the same time. Select Pacific halibut that comes from sustainable fisheries. Select a thick piece of halibut so it isn’t overcooked when it’s baked. This recipe is easily doubled- double the ingredients and bake two packets
Select crisp pale green asparagus with tight firm buds. It will be fresher of it is stored with the stalks in ice. Whether you prefer thin stalks or fatter stalks it is important that they are uniformly thick. To prepare--just snap off the bottoms of the stalks and rinse well. I usually peel the bottom of fatter stalks but this is just a personal choice.
Halibut and Asparagus in Parchment
Makes 2 servings
8 stalks asparagus
1 (8-12 ounce) halibut fillet, about 1 inch thick
1 teaspoon minced shallot
1 teaspoon grated lemon rind
1 teaspoon lemon juice
1 tablespoon butter
1 tablespoon white wine or water
2 lemon wedges
Heat the oven to 400 degrees F. Snap off the bottoms of the asparagus stalks and place them in a microwave safe dish. Add 2 tablespoons water and microwave on high 1 ½ to 2 minutes. By precooking the asparagus it will be cooked tender crisp when the fish is cooked.
Place a 15-inch square of parchment paper on a baking sheet and fold in half. Place the halibut along the fold and cover with the asparagus. Sprinkle with the shallot, lemon rind, and lemon juice. Season to taste with salt and pepper.
Dot with the butter and add the wine. Seal the parchment by folding the edges together several times. It’s important that you get the packet sealed so that the fish can cook in the steam inside.
Bake 18 minutes or until the paper is puffed and browned. Remove the packet from the oven and open carefully, allowing the steam to escape. Check the center of the halibut to be sure it’s cooked through. If it isn’t place the packet back in the oven for 2 to 3 minutes longer. Divide in half and garnish with lemon wedges.
Friday, April 16, 2010
Best Baking Books
The James Beard Foundation has compiled a list of 13 essential baking books. Here is th list:
1. Baking:From My Home to Yours by Dorie Greenspan, 2006
2. Beard on Bread by James Beard, 1995
3. The Book of Great Desserts by Maida Heatter, 1999
4. The Bread Baker's Apprentice by Peter Reinhart, 2001
5. The Cake Bible by Rose Levy Berenbaum, 1988
6. Classic Home Desserts by Richard Sax, 2000
7. Chocolat by Alice Medrich, 1990
8. The Fannie Farmer Baking Book by Marion Cunningham, 1996
9. Great Pies and Tarts by Carole Walter, 1998
10. The Italian Baker by Carol Field, 1985
11. Martha Stewart's Cookies by Martha Stewart, 2008
12. My Bread by Jim Lahey, 2009
13. The Simple Art of Perfect Baking by Flo Braker, 2003
I have many of them on my bookshelf and many more. One I especially like is The Baker's Dozen Cookbook edited by Rick Rodgers, 2001. I also like the King Arthur Baking Cookbooks.
I must also recommend Baking Basics and Beyond by Pat Sinclair, 2006. Not as great as those listed above but a personal favorite!!
What are your favorites? I need to get some more!
Tuesday, April 13, 2010
Dinner at OM
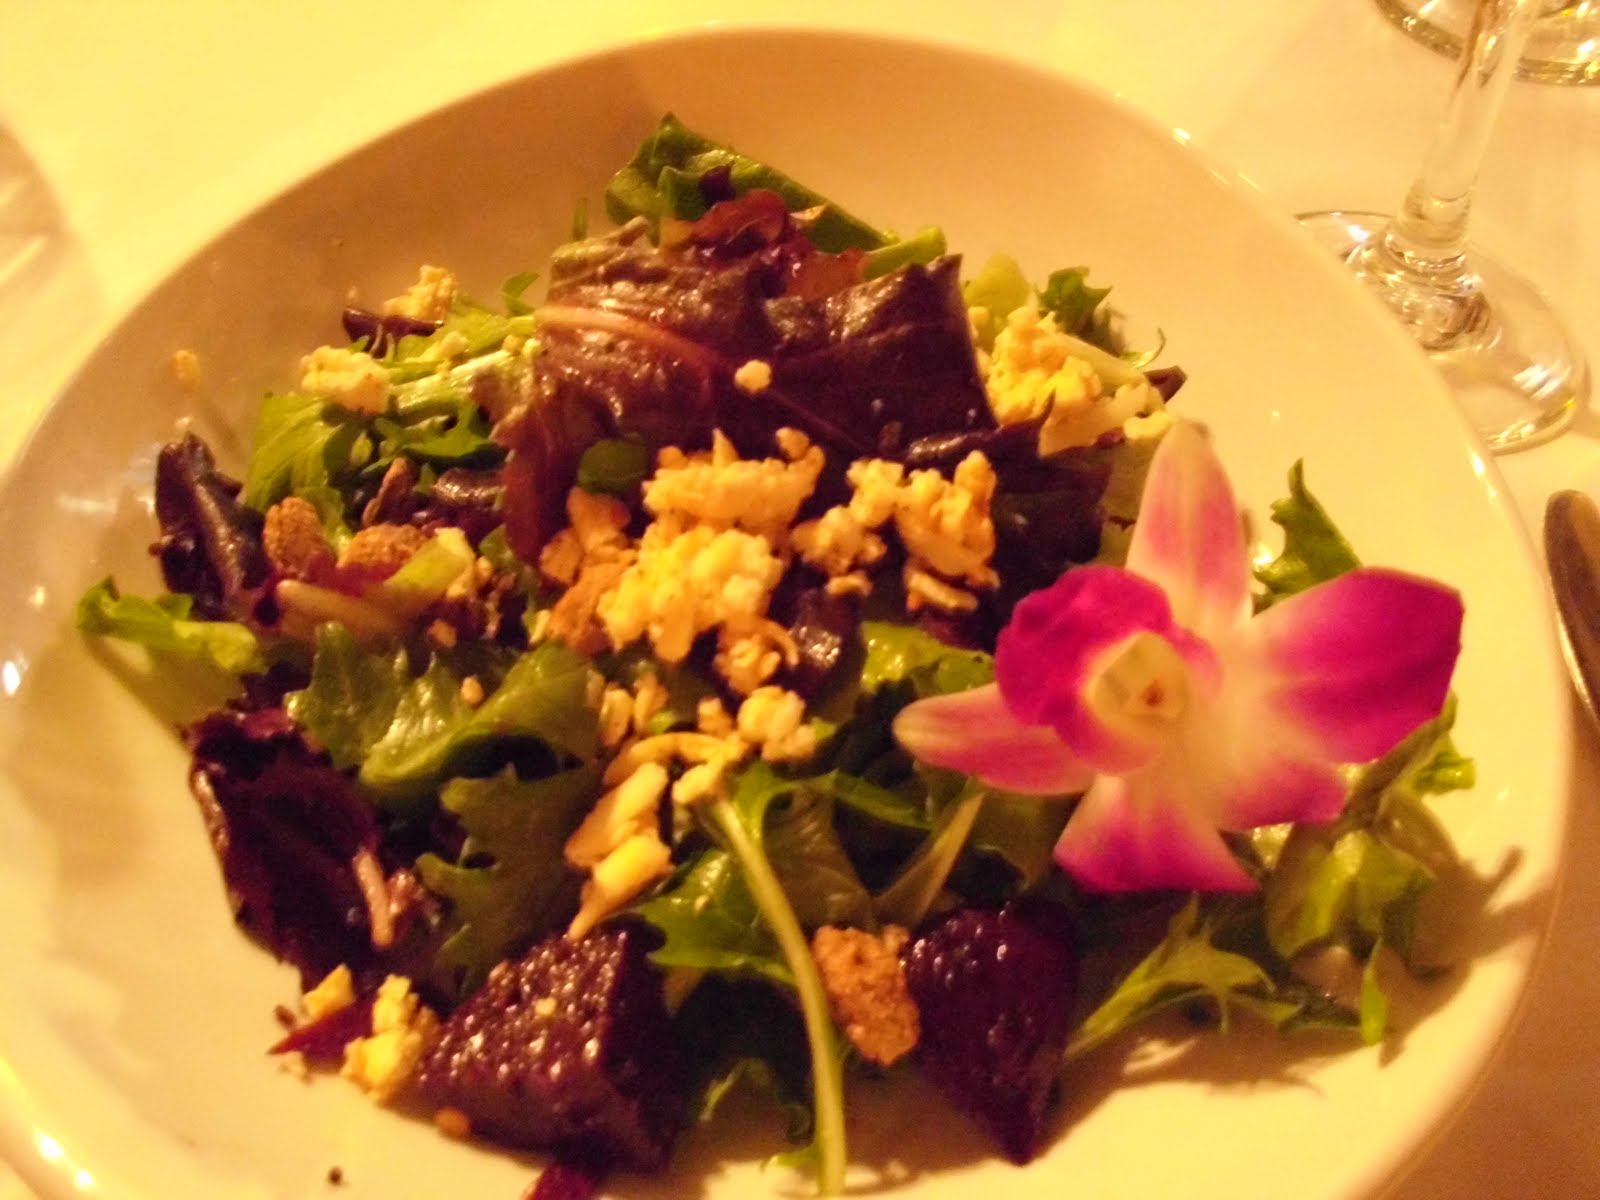

Last night Les Dames d'Escoffier held a benefit at OM restaurant in Minneapolis. One of the partners, Raghavan Iyer was one of the hosts and talked about Indian food. Dara Moskowitz, author of Drink This With Wine spoke briefly after the dinner.
The main dining room is located in the basement of the building and is softly lit. There is a chandelier of crystals on clear strings that glows in the central stairwell. I was so busy visiting with friends and meeting new friends that that is all I noticed of the decor.
The food, however is a different story. Servers passed hors d'oeuvres consisting of a split lentil wafer topped with an avocado tamarind chutney. Very spicy in my mouth!
We were seated for a Roasted Beet Salad Chukander Ka Salad. Organic greens delicately dressed with a raisin vinaigrette. My entree, Lobster Kari, was a medium lobster tail served on a black pepper, cinnamon and coconut milk sauce with lime rice noodles and coconut baby spinach. The lobster meat was infused with the flavors of the sauce, and beautifully presented.
We finished with Fresh Pineapple stewed with blackened red chiles and golden raisins and served warm over vanilla ice cream. Raghavan said that the pineapple was usually an accompaniment to fish but this new combination was extraordinary. The flavors were dancing in my mouth, peppery, warm and silky, cool ice cream with sweet pineapple.
Friday, April 9, 2010
Time to Finish Any Easter Eggs
If you still have any hard-cooked eggs left from the Easter bunny's visit, it's time to use them up. Here's a simple recipe for Deviled Eggs. Everybody loves to eat them but nobody ever makes them. I use the same dressing for making Egg Salad for sandwiches.
Deviled Eggs
6 hard cooked eggs, peeled and cut in half
3 tablespoons light mayonnaise
1/2 teaspoon coarse salt
1/4 teaspoon sugar
1 teaspoon cider vinegar
1 teaspoon honey mustard
Fresh chives
Paprika
Carefully remove the yolks from the whites and set the whites aside.
Placed the yolks in a medium bowl and mash with a fork until no lumps remain or press through a strainer. Stir in the mayonnaise, sugar, salt, mustard and vinegar.
Using a heaping tablespoonful mound the yolk mixture in the whites. Garnish with fresh chives and sprinkle with paprika if desired.
Arrange deviled eggs on an egg plate or on a bed of shredded lettuce.
Monday, April 5, 2010
Still Have Leftovers from Easter?
I appeared on KARE 11 Showcase MN today and talked about Easter leftovers- mostly ham
Here is the link to Showcase
http://www.showcaseminnesota.com/show/client_article.aspx?storyid=847684
I cube leftover ham and chop it finely in my food processor to use in this recipe. You could also used diced or ham cut into thin strips.
Just add a salad and you have an easy dinner that can be made ahead.
Ham and Asparagus Quiche
When asparagus first appears in the spring, I serve it roasted to capture its fresh flavor. As the season progresses, I have lots of additional ways of serving it, such as in quiche, which is appropriate for any meal of the day. Select asparagus stalks that are slim, bright green and crisp, with tight buds at the tips. Arrange the spears in a spokes design for a fancy presentation.
SERVES 8
Pastry for a 9-inch single-crust pie
8 fresh asparagus spears
1 cup chopped ham
1 cup shredded fontina cheese
1 cup whole milk
4 eggs, beaten
1/2 teaspoon dry mustard
1/2 teaspoon coarse salt
Heat oven to 400°F with oven rack in middle.
Crust
Roll out pastry into an 11-inch circle. Loosely roll dough around rolling pin and lift it into pie pan. Unroll and press dough into pan edges and bottom, making sure that the pastry is not stretched. Flute edges if desired.
Bake crust 10 to 15 minutes or until it begins to brown.
Filling
Place asparagus spears in flat dish with 2 tablespoons water and microwave on High 2 minutes to partially cook. Drain well. Asparagus can also be blanched in boiling water.
Sprinkle ham into bottom of partially baked pastry shell and top with cheese. Arrange asparagus spears in a spokes fashion over the cheese.
Combine milk, eggs, mustard, and salt in medium bowl and whisk until mixed. Carefully pour the custard into the crust.
Bake 25 to 35 minutes or until custard is set and a knife inserted in center comes out clean although it will be wet. Cool 10 minutes before serving to allow custard to set up.
Serve warm, at room temperature, or chilled. Store any remaining quiche in the refrigerator.
BAKER’S NOTES: Fontina cheese is a creamy Italian cheese with a nutty flavor made from cow’s milk. Swiss cheese can be used as a substitute.
SECRETS TO SUCCESS: Before cooking fresh asparagus, snap off the tough bottoms of the stalks and rinse thoroughly to remove any dirt. If you break the asparagus into 2-inch pieces, you will get some in every bite.
Wednesday, March 31, 2010
Last Minute Brunch
Even if I know several weeks ahead that I'm hosting an Easter or spring brunch I usually don't decide on the menu very far ahead. There are always so many new recipes I want to try I find it hard to decide.
Here's a recipe I developed for a popular brunch class. Look for prepared crepes in the produce department. I usually add cold smoked salmon (similar to lox) but smoked salmon or grilled salmon are also great choices.
You can prepare the crepes a day ahead, cover and refrigerate. Reheat just before serving. Avocado slices and sprigs of fresh dill are the perfect garnish.
Baked Crepes with Smoked Salmon and Scrambled Eggs Filling
Serves 8
2 tablespoons butter
12 eggs, lightly beaten
¼ cup milk
1 teaspoon salt
1 package (8 ounces) cream cheese, cut into small dice
4 oz package smoked salmon, chopped
2 tablespoons chopped fresh dill
8 purchased crepes
½ cup sour cream
Additional chopped dill
Heat the oven to 375 degrees F. Melt the butter in a large skillet over medium heat. Whisk the eggs, milk and salt until smooth. Add the eggs to the skillet. Cook until the eggs begin to set. Reduce the heat to low and stir until the eggs remain slightly creamy. Remove the eggs from the heat and add the cream cheese, smoked salmon and the chopped dill. Stir gently.
Place a crepe on a work surface and divide the eggs into 8 portions. Spoon the eggs down the center of each crepe. Roll up the crepe and place seam side down in a buttered 13x9 inch baking dish. Cover with aluminum foil. Bake about 20 minutes or until the crepes are heated through. Remove the foil and continue baking until lightly browned about 5 minutes. Serve with sour cream and chopped dill.
Thursday, March 25, 2010
Spring Celebration Brunch
There are so many events celebrated in the spring and I think the easiest way to gather family and friends-for the cook- is to host a brunch. Most of the food can be prepared a day ahead and baked the morning of the party.
Graduations, wedding showers, and Mother's Day are only three possibilities. I serve a main dish, usually a strata such as the Mediterranean Strata below, muffins and or sweet rolls and a fruit platter or a fruit plate.
Don't forget Easter is next week. A perfect time for a spring brunch. Add colorful tulips to the table and bring some spring sunshine inside.
Mediterranean Strata
This hearty brunch casserole brimming with sunny flavors from the south of France is always a hit. Because it can be refrigerated overnight, it can be in the oven as the guests arrive.
MAKES 8 TO 12 SERVINGS
6 English muffins, split and cubed
12 ounces drained, cooked Italian sausage
1 (14-ounce) can extra-small artichokes, drained and quartered
1/2 cup chopped roasted red pepper
1/4 cup Kalamata olives or ripe olives, pitted and sliced
1 1/2 cups shredded Provolone cheese
4 ounces feta cheese, crumbled
3 cups whole milk
8 eggs, beaten
2 tablespoons basil pesto
1/2 teaspoon coarse salt
Lightly spray 13 x 9-inch baking dish with nonstick cooking spray.
Arrange muffin cubes in bottom of baking dish. Crumble sausage over muffins and top with artichokes, red pepper, olives, Provolone cheese, and feta cheese.
Beat milk, eggs, pesto, and salt until blended in large bowl and pour over other ingredients. Using a spoon, press ingredients down into the liquid. Cover with plastic wrap and refrigerate overnight.
Heat oven to 350°F with oven rack in middle. Uncover the casserole.
Bake 40 to 50 minutes or until set and a knife inserted near center comes out clean although it will be wet.
Letting the dish sit for 5 to 10 minutes before cutting makes it easier to serve. Cover and refrigerate any remaining.
BAKER’S NOTE: You can let the dish stand at room temperature about 1/2 hour until the milk is absorbed if you don’t want to make it the day before serving.
SECRETS TO SUCCESS: I like the texture of English muffins, but cubed French bread or other chewy bread creates variety.
Unless you make your own pesto with fresh basil from the garden, purchase it already prepared. You can also purchase roasted red peppers in a jar.
Tuesday, March 23, 2010
Think Spring: Think Asparagus

This is the time of year when it seems like winter will never end. I was just in upstate NY and say crocuses popping up through the grass. At least our snow is melted and we're having bright sunny days but no sign of crocuses.
One of the problems with eating fresh and local is very evident this time of year. We're tired of winter vegetables but there are no fresh spring vegies appearing. At least at the supermarket fresh asparagus is abundant but not cheap. I question the nutritive value of fresh asparagus by the time I get it home and prepare it, but like all vegetables while some vitamins may be diminished it's still a nutrition powerhouse.
Asparagus is one of the vegetables I often prepare in the microwave because it is so quick and keeps its brilliant green color. I also like to toss the spears with a little olive oil and roast it as 425 degrees about 5-7 minutes. Sprinkle with a little lemon juice and sea salt just before serving.
Frozen vegetables can be more nutritious than those from the supermarket because they are frozen shortly after harvest locking in nutrients. I especially find frozen baby peas and asparagus cuts great substitutes for fresh. USDA values indicate that as much as 50 % of some nutrients can be lost in just 1 or 2 days storage at room temperature but nutrients such as fiber, minerals and fat soluble vitamins are fairly stable. When you purchase fresh vegetables refrigerate them as soon as possible and serve them within a few days.
Tuesday, March 16, 2010
St. Patrick's Day for Two or More


Be sure to wear green tomorrow! We'll be having Crock-pot Corned Beef, with New Potatoes and Stir-fried cabbage. Instead of cooking the cabbage with the corned beef, I'm going to quickly stir-fry it. This keeps the delicate green color and prevents any bitter flavor compounds from developing. I don't know if it is Irish or not, but I like horseradish with my corned beef.
Since corned beef doesn't come small enough to serve only two, I selected a 3 pound package and plan to make Reuben Sandwiches with the leftover meat. For each sandwich I use 3 thin slices of the corned beef, 1-2 tablespoons thousand Island dressing, a slice of Swiss cheese and about 1/4 cup drained sauerkraut. My favorite bread is pumpernickel and I lightly butter the outside of both slices of bread. I cook the sandwiches on my panini grill.
Rye or pumpernickel bread sometimes comes in a half loaf, and I freeze any bread we don't use. Any remaining sauerkraut also goes into the freezer. Swiss cheese is added to sandwiches. Other times of year I use deli turkey and make "Rachel" sandwiches. Still very tasty and definitely healthier!
The luck of the Irish to ye!
Wednesday, March 10, 2010
California Cooking

When I was in CA recently I was fortunate enough to take two cooking classes. The first class, Big, Bold, Beautiful Cabernet at Sur l'Table in San Francisco featured five recipes containing cabernet. Since Napa Valley is famous for its' "cabs" it was the perfect class for me before we spent a couple of days in Napa.
Cabernet is know for its body and depth and pairs well with steaks and fatty fish such as salmon. We prepared Steak au Poivre with drunken cab-infused mushrooms, Steak burgers with a cabernet reduction( like an onion jam) and Salmon with a balsamic/cabernet glaze. The steaks were seared in a skillet at high heat and finished in a 400 degrees F. oven. This is a great way to prepare steak for guests as you don't have to be cooking the steaks at the last minute and can finish up as the steaks rest.
My second class was a demo class at the Culinary Institute on American in St. Helena. Once again we had Steak au Poivre, Classic Bistro fare. The CIA has a beautiful demo classroom with stadium seating and a camera that focuses on the action. The chef did an excellent job of teaching as she prepared the foods and had no trouble filling the time. She emphasized that the recipes were guidelines with lots of flexibility.
Thursday, March 4, 2010
Foodie Fun in Sunny California

I just returned from a week in San Francisco and Napa Valley and was very lucky to see so little rain. When we looked at weather forecasts before we left snowy Minnesota, several days had predictions of a 95% chance of rain. I did survive a downpour in Chinatown, but it only lasted a couple of hours.
While my husband attended a conference, I played and ate for three days. Fortunately I also did a lot of walking. Here is a brief synopsis of my "foodie fun"
The first morning I spent at the Ferry Terminal and enjoyed a fish taco for lunch while I sat beside the bay and listened to a yippy seagull. I also sampled sea salt caramels and S'Mores from Recchiuti Candies. Cowgirl Creamery provided some of the best blue cheese I've ever eaten produced at their Point Reyes creamery. It was so rich and velvety, it stuck to the knife and melted on my tongue.
For a mid-afternoon break, I devoured a buttery, flaky almond croissant from Acme Bakery and sipped a latte from Peet's Coffee and Tea.
After all this, I hopped on a cable car and rode up and down the hills enjoying the sunny day, although it was a bit nippy!
In the next few posts I provide details of my meals at Zuni Cafe, Boulevard and Bottega (Napa Valley). My walking tour ended with a Dim Sum lunch in Chinatown. I also took a class "Cooking with Cabernet" at Sur L'Table and a demonstration at the CIA (Culinary Institute of America) in St. Helena. And more!
Monday, February 22, 2010
Meatless Monday
There's been a lot of talk about "Meatless Mondays" as a healthy way to make dietary changes. I have found that for me to feel full I need to have protein, not carbs. The following recipe contains high quality egg protein and milk protein in the Cheddar cheese.
Studies show that saturated fat raises blood cholesterol levels to a greater degree than ingested cholesterol and eggs are again a part of healthy diets. Use Cheddar cheese made with 2% milk to decrease fat if you like. When I use a small amount of cheese I find that full-fat tastes best, but I also like the 2% cheddar.
What do you serve for Meatless Mondays?
Spinach Frittata
Makes 2 servings
1 teaspoon butter
1 teaspoon olive oil
1/4 cup chopped onion
1/4 cup diced red pepper
1 1/2 cups frozen shredded hash browns, thawed
1 cup fresh baby spinach leaves
1 clove garlic, minced
4 eggs
1/4 cup milk
1/4 teaspoon salt
1/8 teaspoon pepper
1/4 cup shredded Cheddar cheese
Heat the oven to 350 degrees F.
Heat the butter and olive oil in 9-inch nonstick skillet over medium heat. Add the onion and red pepper and cook 2-3 minutes or until softened. Add the potatoes and cook 6 to 8 minutes or until the potatoes begin to brown. Add the spinach and garlic and cook until the spinach is wilted.
Beat the eggs, milk salt and pepper in a medium bowl until smooth. Pour over potatoes. Cook, 2 to 3 minutes, lifting edges and allowing uncooked egg to flow underneath.
Sprinkle with cheese and bake 15 to 20 minutes or until set. Cut into 4 wedges to serve.
Friday, February 19, 2010
Celebrate the Olympics in Canada
It's hard not to get caught up in the excitement of the Olympics. Especially for the Winter Games there are always a lot of Minnesotans involved.
Here's my recipe for a Canadian classic, Tourtiere. It's a two-crust pie filled with a spicy pork filling. Traditional for Christmas Eve, I'm planning to serve it with a salad as we watch and cheer "USA, USA". Keep it simple and purchase refrigerated pie crusts or follow my recipe for a tender flaky pastry.
Tourtière
Serve warm from the oven, or make ahead and serve it at room temperature or reheated. Use refrigerated pastry as a time-saver. Add a salad for a complete meal.
SERVES 8
Crust
Pastry for a 9-inch double-crust pie
Filling
1 tablespoon olive oil
1 cup chopped onion (1 medium)
1 teaspoon minced garlic
1 1/2 pounds ground pork
2 tablespoons all-purpose flour
1/2 teaspoon cinnamon
1/2 teaspoon poultry seasoning
1/4 teaspoon salt
1/8 teaspoon ground mace
1 cup chicken broth
Fresh ground pepper
2 tablespoons chopped fresh parsley
Crust
Roll out half of pastry into an 11-inch circle. Loosely roll dough around rolling pin and lift it into pie pan. Unroll and press dough into pan edges and bottom, making sure that the pastry is not stretched. Chill while preparing filling.
Filling
Heat olive oil in 9-inch skillet over medium heat. Add onion and cook until it softens, stirring occasionally. Add garlic and cook 30 seconds.
Crumble pork into the pan. Cook over medium-high heat until meat is well browned and all pink has disappeared. Drain off fat. Reduce heat to low. Stir flour into meat and sprinkle with seasonings. Add broth and stir until sauce thickens. Season with pepper and add parsley. Remove from heat and cool to lukewarm.
Heat oven to 400°F with oven rack in lower third.
Spoon lukewarm filling into the pastry. Roll remaining dough into 11-inch circle and place over filling. Pinch edges to seal. Flute the edges if desired. Cut several slits for steam to escape during baking.
Bake 30 to 40 minutes or until golden brown. Serve warm or at room temperature. Store pie in refrigerator.
BAKER’S NOTE: You can reheat the pie in about 30 minutes in a 350°F oven.
Basic Pie Crust
Tender and flaky pie crust is easy to make if you follow directions carefully and use a food processor. I use a combination of butter (for flavor) and shortening (for flaky tenderness). After making the dough, it should be chilled before rolling out and handled as little as possible.
PASTRY FOR 1 DOUBLE-CRUST OR 2 SINGLE-CRUST PIES
3 cups all-purpose flour
1/2 teaspoon salt
1/3 cup cold butter, cut into small cubes
1/2 cup vegetable shortening
6 tablespoons ice water
Place flour and salt in food processor bowl. Pulse briefly to mix. Add butter and shortening and pulse until crust resembles coarse crumbs. Pour ice water through processor tube while processor in running. Continue to process 15 to 30 seconds or until crust begins to form large clumps. If dough doesn’t clump, add a little more water, 1 teaspoon at a time.
Turn pastry out onto a clean surface and gather it together. Cut in half and shape each half into a flat disc, about 5 inches across. Wrap pastry discs in plastic wrap and chill at least 1 hour. (If you only need pastry for a one-crust pie, tightly wrap the remaining disk and freeze.)
Sprinkle flour lightly on your work surface. Remove 1 pastry from refrigerator, unwrap, and dust both sides lightly with flour. Place dough in center of work surface.
Place rolling pin in center of disk and roll out dough to the edge. Rotate dough about one-quarter turn each time you roll. Roll the dough circle to an 11-inch diameter, about 1/8 inch thick. Until you’ve made a few pies, your circle will be ragged. Continue by following the recipe above.
Subscribe to:
Posts (Atom)

